
The 5 Best Irons For Perler Beads The Creative Folk
Step 1: Design Your Pattern The first and arguably most enjoyable step is letting your creativity run wild. Begin by thinking about what pattern or image you'd like to create. Some individuals prefer to sketch their ideas out on paper beforehand. Once you have a vision, start placing your beads on the pegboard.

Fruit Perler Bead Melt beads patterns, Perler beads designs, Melty bead designs
Hey everyone! In today's video, I will be showing you a Perler bead compilation of 20 easy designs! I hope you enjoy. Be sure to like this video and subscrib.

Ironing Bead Designs PAINTING BEADS
1. Place your fluffy towel flat on the ironing board, then place your stitched work face down on the towel: 2. Gently spray some water on the back of the stitched fabric - just enough to relax the linen flat (you'll see it flop). No need to get it too wet, unless it's really very badly creased. 3. Now iron the back of the stitched fabric.

Ironing Bead Designs PAINTING BEADS
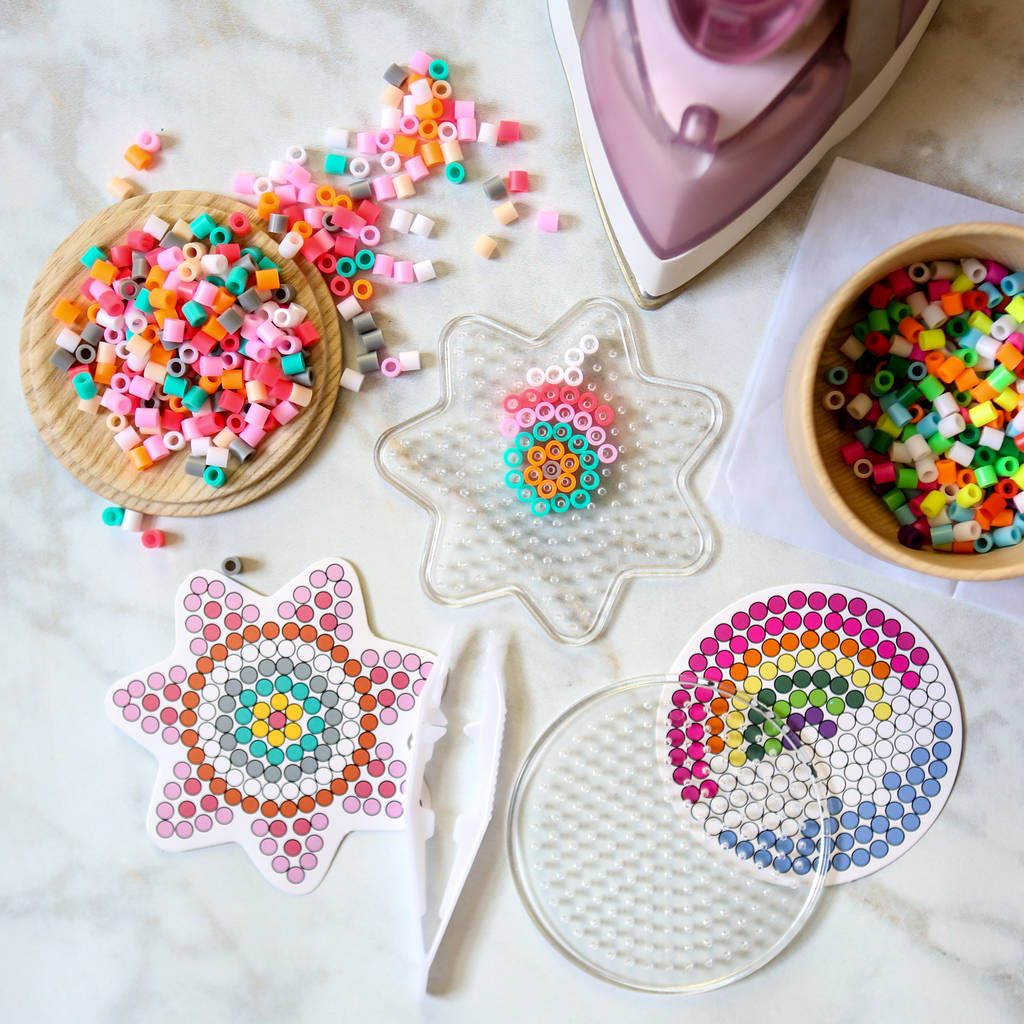
1. Set Up Your Workspace: 2. Design Your Pattern: 3. Prepare the Iron: 4. Cover the Beads with Ironing Paper: 5. Start Ironing: 6. Allow to Cool: 7. Carefully Remove from the Pegboard: Additional Tips and Tricks: 1. Experiment with Different Designs: 2. Ensure Even Heat: 3. Double Layering: 4. Care and Maintenance: Conclusion: What You'll Need:

Pin by Starlight Glimmer on Perler bead pattern Perler beads designs, Perler bead art, Melting
This is a long requested video! This is how I iron my creations. PLEASE NOTE: your iron, your heat setting and the types of beads you use will affect how yo.

Perler beads hearts Perler bead patterns, Beading patterns, Perler crafts
- Clothes iron (preferably a mini iron) - Parchment/ironing paper - Tweezers (optional) Warning: Make sure a grown-up supervises kids as the beads are a choking hazard. A grown-up should help with the ironing as well for (what I hope are) obvious reasons. 11 Easy Animals and Nature Perler Bead Patterns

Iron Beads Patterns PAINTING BEADS
Step 1: Lay Out Your Design Initiate your project by positioning your beads onto the pegboard. Before you start, visualize or sketch your desired design. The idea is to place each bead onto its corresponding peg, ensuring it's secure and doesn't topple over.

Pin by Sakura on アイロンビーズ Perler bead art, Hama beads patterns, Diy perler bead crafts
Don't hold it too long. Pick it up, reposition, and lightly press again. Now, you don't want to iron for too long or the beads will melt more than you'd like them to. But you need to iron it long enough that the beads fuse together. Some prefer to melt the perler beads so that you cannot see the openings in the beads.

Sports Craft Ideas for Kids Game On VBS Perler bead art, Melty bead patterns, Diy perler beads
1. Preparation: Before you begin the ironing process, ensure you have the following items ready: - Your completed Perler bead design on the pegboard. - Ironing paper or parchment paper to protect your iron and beads. - An iron set to a moderate heat level (usually the cotton setting works well).

How To Do Melted Bead Art BEAD SKIN BRIGHT
Set your Iron to a medium setting (I usually put mine between polyester and silk) and make sure there is no water in it. Cover the bead design with your parchment paper and iron in a circular motion until the beads are fused together.

Perler Bead Designs, Patterns and Ideas
Pick it up and press the iron a second time after a few brief spans of time. Normally, it takes 15 - 20 seconds for the perler beads to fuse together in a single piece. Continue to iron the beads in a circular motion until they are completely bonded together.

Fuse beads, Fuse bead patterns
When it's time to iron your design first you need to place ironing paper over the beads. Iron in a circular motion without letting the iron stay in one spot for too long. I usually keep my iron on medium heat so that it doesn't melt the design too quickly. You may need to iron your design several times on each side.

Ironing beads coaster Ideas Para, Coasters, Diy Crafts, Beads, Projects, Manualidades, Beading
May 29, 2014 - Explore Kerry Murphy's board "Iron Bead designs" on Pinterest. See more ideas about iron beads, bead designs, perler bead patterns.
Ironing Beads Craft Kit By Berylune
Karen Kavett. Begin by painting your flower pot whatever color you like (Image 1). Carefully cut Perler beads in half using sharp scissors (Image 2). Apply tacky glue to the flower pot in small sections and add the Perler beads to make your design (Image 3). Allow the glue to dry completely.

iron beads ideas design ironbeadsideasdesign Perler Beads Perler beads designs, Perler
410 Ironing Beads Ideas in 2023 | perler bead patterns, perler beads designs, melting beads Ironing Beads Ideas 410 Pins 4w I Collection by Irisik Similar ideas popular now Perler Beads Fuse Beads Hama Beads Perler Bead Designs Perler Beads Ideas Hamma Beads Ideas Diy Perler Bead Crafts Hama Beads Design Perler Bead Templates Perler Bead Art

Temple Bead Pingu Needlework Temple Bead Pingu Bowls Pingu Manual work Bowls Pingu B
Mar 10, 2021 - Explore Nicole Robinson's board "Iron bead patterns" on Pinterest. See more ideas about iron beads, perler bead patterns, perler patterns.